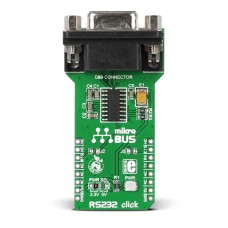
RS232 click
RS232 click is a simple solution for adding RS232 connectivity to your design. RS232 is a serial communications standard mostly used for industrial machines, networking equipment and scientific instruments, as well as for computer peripherals. The board features a standard RS232 DB9 port and a MAX3232 IC, along with a mikroBUS host socket, three jumpers and a power indicator LED. RS232 click communicates with the target board through mikroBUS™ RX (RXD), TX (TXD), CS (RTS), and INT (CTS) lines. RS232 click is designed to use either a 3.3V or 5V power supply.
RS232 click is a simple solution for interfacing any TTL serial port to the RS232 communications standard.
Specifications
| Type | RS232 |
| Applications | Simple solution for adding RS232 connectivity to your device |
| On-board modules | RS232 DB9 port and a MAX3232 IC |
| Key Features | Jumper positions for connecting RTS (J2) and CTS (J3) lines |
| Key Benefits | Designed to use either a 5V or a 3.3V power supply |
| Interface | GPIO,UART |
| Input Voltage | 3.3V or 5V |
| Compatibility | mikroBUS |
| Click board size | L (57.15 x 25.4 mm) |
Programming
The following code snippet shows how to use the built in UART library to communicate with the RS232 click.
 1 char uart_rd;
 2
 3 void main() {
 4
 5   UART0_Init(56000);              // Initialize UART module at 56000 bps
 6   Delay_ms(100);                  // Wait for UART module to stabilize
 7
 8   UART0_Write_Text("Start");
 9   UART0_Write(13);
10   UART0_Write(10);
11
12   while (1) {                     // Endless loop
13     if (UART0_Data_Ready()) {     // If data is received
14       uart_rd = UART0_Read();     // read the received data
15       UART0_Write(uart_rd);       // and send data via UART
16     }
17   }
18 }
Code examples that demonstrate the usage of RS232 click with MikroElektronika hardware, written for mikroC for ARM, AVR, dsPIC, FT90x, PIC and PIC32 are available on Libstock.
Downloads
RS232 click ExamplesRS232 click User manual
Enter the code in the box below:


